

The EDRA Edge: Simple Ultrasound and Needle Selection Tweaks to Improve Your Block Success Rate Tomorrow
Dr. Rasika Timane
Anaesthesiologist, ISA Nagpur City Branch

Ultrasound guidance has made accurate needle placement the standard in regional anaesthesia. A few systematic seconds spent optimising your machine settings, ergonomics and needle choice can turn a blurry screen into a sharp, actionable roadmap — and improve your block success rate as early as tomorrow.
The use of ultrasound guidance for inserting peripheral nerve blocks has become standard practice, as it allows for more accurate needle placement. Visualising anatomical structures dynamically has largely replaced traditional landmark-based or blind paraesthesia-elicitation approaches, and blind-insertion techniques are increasingly becoming the exception, reserved primarily for rescue scenarios where advanced imaging is unavailable.
Despite these advancements, regional anaesthesia (RA) carries inherent procedural challenges. Historically, regional techniques relied heavily on subjective sensory feedback, such as the tactile “loss-of-resistance” to air or saline during epidural placement. A primary limitation of blind techniques is that even experienced supervisors cannot objectively verify events at the needle tip. They can never be entirely certain whether a true anatomical compartment or a false loss-of-resistance was felt. This is why training RA techniques in simulation environments remains essential.
Transitioning to ultrasound guidance introduces its own steep learning curve. Novice learners frequently struggle to distinguish target peripheral nerves from surrounding structures like tendons, blood vessels and muscle groups on grayscale images. Misidentifying target structures can lead to procedural failure, patchy blocks, or serious complications such as intravascular injection and neural injury.
Consequently, acquiring robust sonoanatomical knowledge and scanning skills remains a major challenge during early procedural training. It is a complex skill to master, but one that yields enormous benefits for the patient. To avoid poor outcomes, clinicians must maintain meticulous attention to detail, ensure continuous visualisation of the needle, and understand common acoustic artifacts.
Optimising ultrasound machine settings and structural ergonomics can instantly transform a blurry screen into a sharp, actionable roadmap. Taking just a few systematic seconds to calibrate your machine before needle insertion significantly improves needle tracking, clarifies fascial planes, and increases your regional anaesthesia success rate.
Five Simple Ultrasound Tweaks to Optimise Your Next Nerve Block
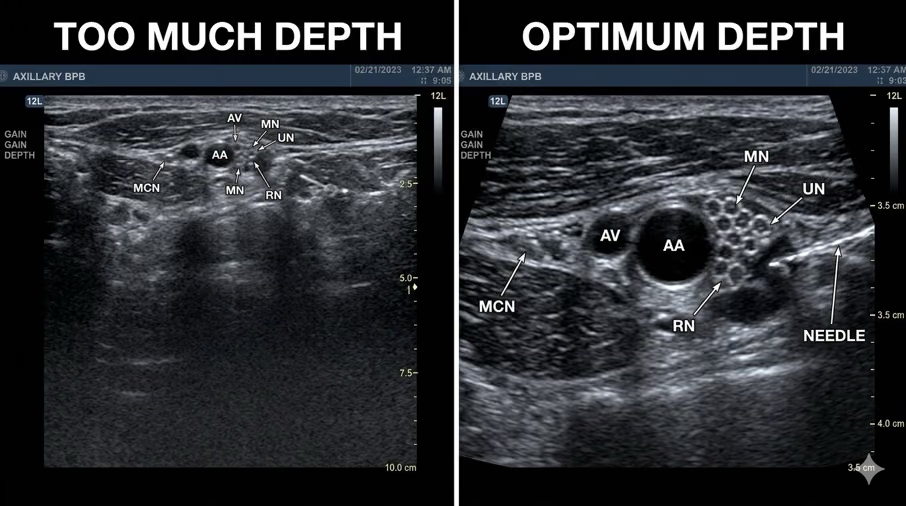
1. Match the Depth to the Target
The Tweak
Fine-tune depth so the target nerve and its immediate anatomical landmarks occupy roughly three-quarters (75%) of the screen.
How it works
Leaving the depth too deep wastes valuable screen real estate on deep, irrelevant structures and drops your overall frame resolution. Setting it too shallow risks cutting off vital baseline landmarks or obscuring deeper structures just below your target. Perfect framing maximises your spatial resolution exactly where your needle operates.
2. Align the Focal Zone near the Target
The Tweak
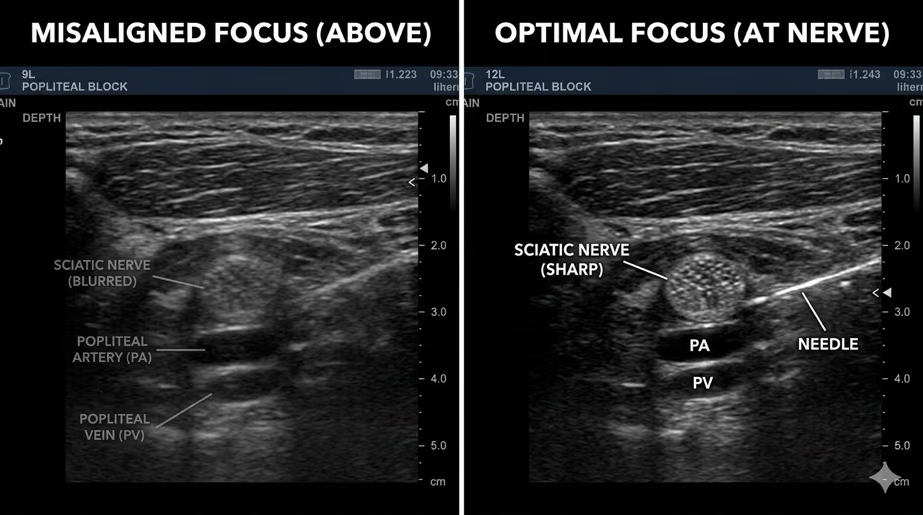
Locate the focal arrow (caret or dot on the side of your monitor) and move it so it sits at or just below the level of the nerve or fascial interface.
How it works
The ultrasound beam is at its narrowest and most concentrated at the level of the focal zone, providing the highest lateral resolution. Aligning the focus ensures optimal granularity, sharpening the boundary between nerve bundles and the surrounding tissue, hence maximising image clarity.
3. Compress the Dynamic Range
The Tweak
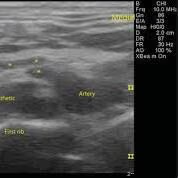
Decrease the dynamic range (or log compression) setting to generate a high-contrast image.
Why it works
A broad dynamic range displays many shades of grey, which can make the screen look hazy or washed out. Compressing the dynamic range eliminates the muddy mid-tones. It makes your “darks darker” (like anechoic blood vessels) and your “lights lighter”, accentuating the bright, hyperechoic fascial sheets that you need to trace and separate during an injection.
4. Fine-Tune Overall Gain and Prevent Washout
The Tweak
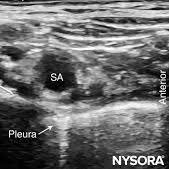
Lower the overall gain until fluid-filled structures (like arteries) are completely black, and tissues have distinct borders. If your machine features Time Gain Compensation (TGC), adjust the individual sliders to balance the brightness evenly from the superficial to the deep fields.
How it works
Excessive gain creates an oversaturated, bright white image that blends muscle and nerve tissue together, obscuring the needle tip. Balancing the gain allows you to clearly differentiate subtle tissue layers and maintain steady sight of your needle as it traverses the field.
5. Establish a Straight “Line of Sight” Ergonomic Alignment
The Tweak
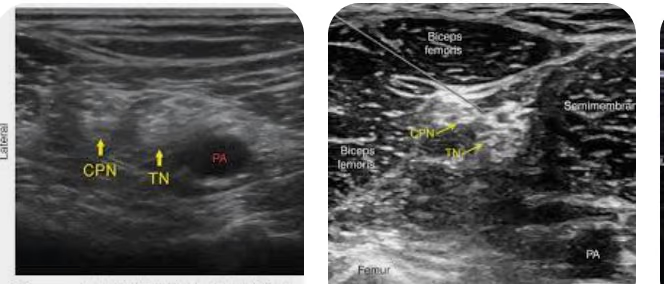
Position the ultrasound screen directly in front of you, in line with the patient’s target anatomy and your intended needle insertion vector.
How it works
If you have to twist your neck or look sideways to see the screen, your hand will naturally drift, throwing off your needle-to-probe alignment. A direct, straight line of sight allows you to make microscopic needle adjustments effortlessly, ensuring you stay perfectly in-plane throughout the procedure.
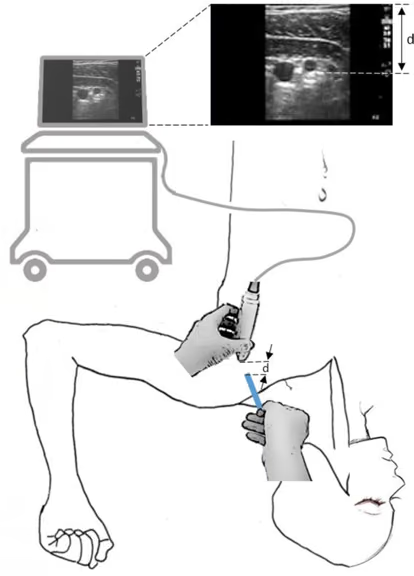
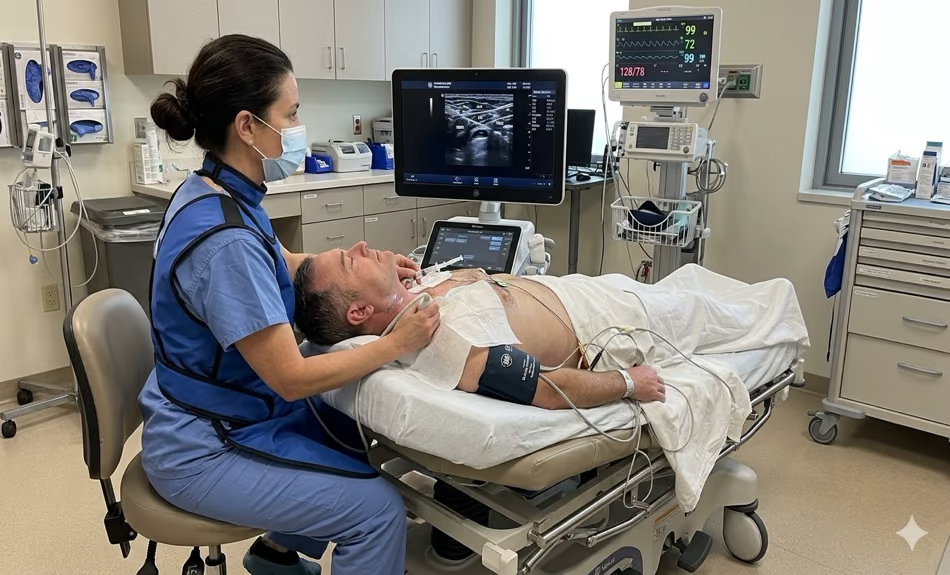
Implementing these changes will allow you to enjoy the learning process of acquiring great-quality images of the desired structure, and will help in aligning the needle with the probe, enabling complete visualisation of the needle.
Needle Selection for Ultrasound-Guided RA
Echogenic needles for ultrasound-guided regional anaesthesia are needles designed with surface modifications that reflect ultrasound waves back to the transducer, improving visibility at steeper insertion angles.
Many echogenic needles have electrical insulation along the shaft with an exposed conductive tip, allowing anaesthesiologists to use dual guidance — ultrasound visualisation and peripheral nerve stimulation — when performing specific blocks.
Types of Surface Modification Technologies
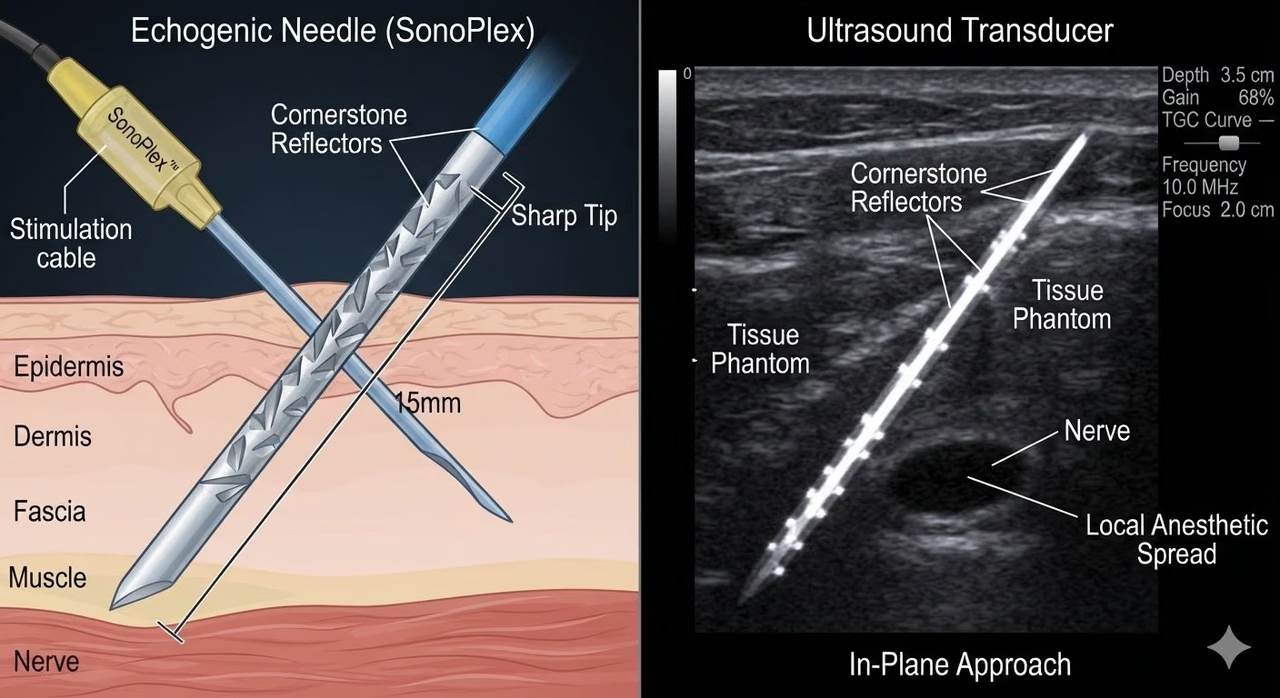
- Cornerstone Reflectors / Indentations: Micro-machined indentations, dimples, or reflectors stamped near the needle tip (e.g., Pajunk Cornerstone technology) scatter and reflect the ultrasound beam from multiple angles, ensuring high visibility regardless of the insertion trajectory.
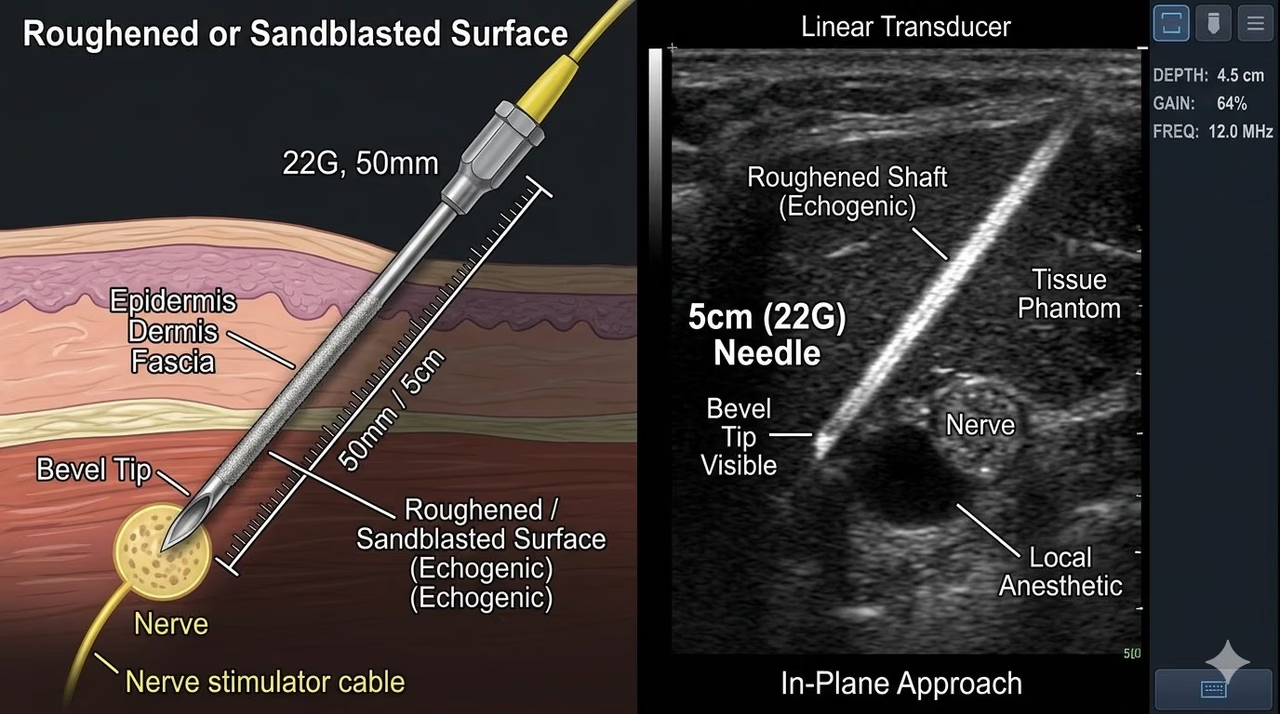
- Roughened or Sandblasted Surfaces: Mechanical alteration of the outer metal surface creates microscopic irregularities that bounce ultrasound waves back more effectively than a polished, smooth standard cannula.
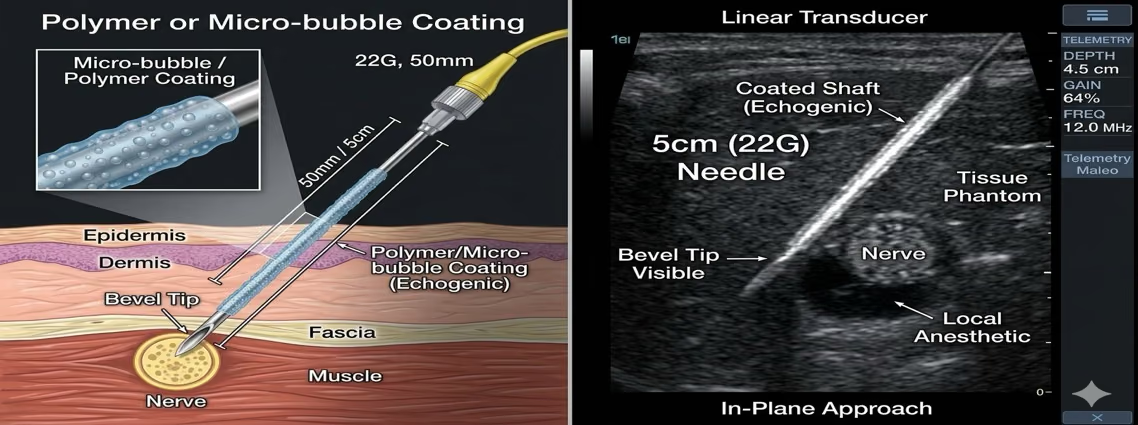
- Polymer or Micro-bubble Coatings: Thin polymer layers embedded with microscopic gas-filled bubbles or particles (such as NanoLine coatings) enhance the acoustic impedance mismatch between the needle and the surrounding tissue.
Commercial Examples
- Pajunk SonoPlex® / SonoTAP®: Features specialised 360-degree corner reflectors stamped into the distal tip area alongside smooth polymer coatings (NanoLine) for optimised gliding and precise nerve stimulation capabilities.
- B. Braun Stimuplex® echogenic needles and Wygon echogenic needles: Utilise specialised mechanical surface structuring near the tip to boost reflection during both in-plane and out-of-plane approaches.
Understanding and Troubleshooting Crucial Ultrasound Artifacts
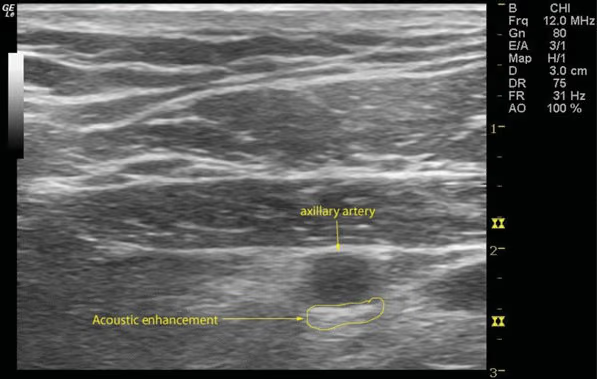
1. Acoustic Enhancement
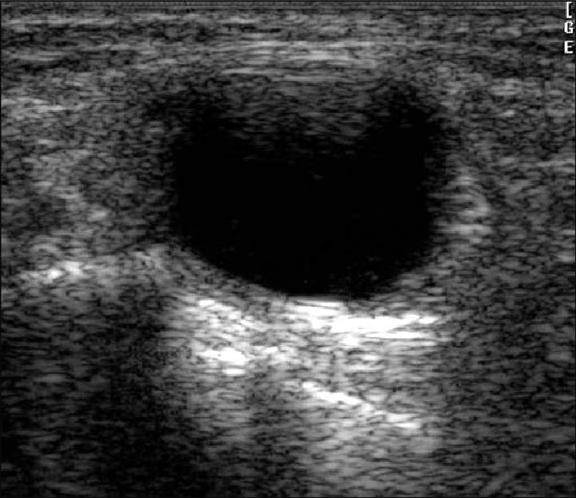
Acoustic (posterior) enhancement, or enhanced through-transmission, refers to the increased echoes deep to structures that transmit sound exceptionally well. This is characteristic of fluid-filled structures such as arteries, cysts, the urinary bladder and the gallbladder. Fluid in a cyst attenuates sound much less than the surrounding tissue, so it is seen as increased echogenicity (whiteness) posterior to the cystic area.
Tricks
To troubleshoot and manage this artifact, adjust the Time Gain Compensation (TGC), change the scanning angle, or use spatial compounding.
2. Anisotropy
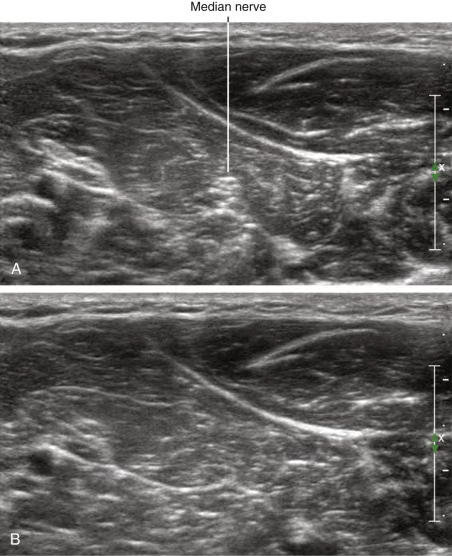
When the ultrasound beam is incident on nerves such as the median or sciatic, the organised neural elements may reflect a majority of the insonating sound beam in a direction away from the transducer. When this occurs, the transducer will not receive the returning echo and assumes that the insonated area is hypoechoic. This anisotropic effect depends on the angle of the insonating beam. The maximum return echo occurs when the ultrasound beam is perpendicular to the nerve. Decreasing the insonating angle will cause the nerve to change from brightly hyperechoic to darkly hypoechoic. If the angle is then increased, the nerve will again appear hyperechoic.
Tricks
Keep the transducer perpendicular (at a 90-degree angle) to the structure of interest so that the sound beam reflects directly back to the probe. Heel-toe manoeuvre: rock the ends of the transducer up or down to align the beam perpendicularly along the longitudinal axis of the nerve. Fanning or toggling: angle the probe from side to side or tilt it slightly without changing the centre point of the base contact on the skin.
3. Bayonet Artifact
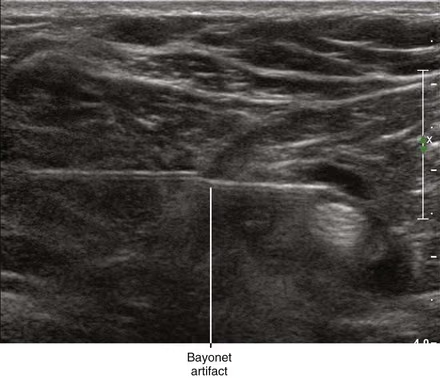
It is encountered in ultrasound-guided needle techniques and results in the apparent bending of the needle as it passes into or adjacent to tissue with different sound transmission speeds. In constructing an ultrasound image, the machine assumes a constant speed of sound (1540 m/s), but some tissues conduct sound at slightly higher or lower speeds. When the needle passes into a vessel, or a lesion surrounded by fat, there can appear to be bending of the needle towards the transducer (in the case of the vessel) or away from the transducer (in the case of fat).
Tricks
Adjust the transducer angle (insonation angle). Tilt or rotate the probe: the artifact is most pronounced when the ultrasound beam is nearly perpendicular to the needle as it crosses into a different tissue medium. Shifting the probe angle dynamically alters the refraction path and can clear up the false bend.
4. Reverberation Artifact
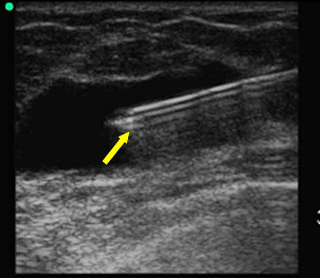
It occurs when an ultrasound beam encounters two strong parallel reflectors. The beam reflects back and forth between the reflectors (“reverberates”), and the transducer interprets the returning sound waves as deeper structures since it took longer for the wave to return. This creates a series of linear, equally spaced false echoes deeper on the screen.
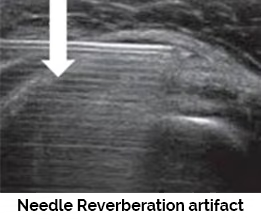
Tricks
Reverberation artifacts can be improved by changing the angle of insonation: tilt or rotate the probe so that reverberation between strong parallel reflectors cannot occur. Lower the near-field gain or overall gain to make the repeated, equally spaced false echoes fade out. Additionally, decrease the transducer frequency or adjust the focus zone to alter how the sound beam interacts with the superficial tissue layers.
Conclusion
Implementing these tactical changes will significantly improve the image quality of your structure of interest and clarify your needle path, directly helping the anaesthesiologist improve their success rate. Every practitioner should be intimately familiar with the ultrasound machine’s standard tissue artifacts and the special artifacts associated with needling — mastering how to minimise these anomalies will improve the success rate of your blocks by leaps and bounds.